Whether you're exploring peptide therapy for fat loss, muscle recovery, better sleep, or one of the countless other benefits, one thing matters above all: how safely and correctly you're handling them.
This guide is here to help you avoid costly mistakes. We’ll cover how to reconstitute peptides, inject them safely, store them properly, and know what to look for in high-purity sources—plus how to track your protocol like a pro.
But first, let’s cover the most common question...
What Are Peptides?
Peptides are short chains of amino acids your body already makes to carry out important tasks like healing injuries, building muscle, or regulating mood.
Today, scientists can synthesize many of these peptides in labs, creating versions that are nearly identical to what your body produces—but in more concentrated, targeted forms. That means you can support or enhance specific processes like fat burning, recovery, cognitive performance, hormone regulation and more using synthetic therapeutic peptides.
In other words: these aren’t foreign chemicals—they’re lab-created versions of what your body already produces to take care of a myriad of essential functions every day.
What makes peptides so effective is their ability to zero in on one very specific function in the body. Some mimic hormones, others influence inflammation, and many activate regeneration or metabolic processes with minimal systemic stress.
Peptides can do amazing things—but only if you treat them with the respect they deserve. That means learning how to mix them correctly, inject safely, track your doses, store them right, and buy from reputable sources. The better your process, the better your outcomes.

Reconstituting Peptides: How to Mix Them Properly
Before you inject anything, you have to mix the lyophilized powder in the vial with liquid. Here's how to do it safely:
What Liquid Should You Use?
- Bacteriostatic Water (BAC Water) – Also called Reconstitution Solution. This is the gold standard. It contains a tiny bit of benzyl alcohol to prevent bacterial growth.
- Sterile Water – OK for single-use vials. Not safe for long term storage.
- DO NOT use tap, bottled, or distilled water—those aren’t sterile.
Step-by-Step
- Use a clean insulin syringe to draw your water.
- Inject slowly into the vial—don’t blast the powder.
- Let it dissolve naturally—swirl gently if needed, but don’t shake it.
How to Properly Store Peptides
Proper storage is critical if you want your peptides to stay stable, potent, and effective. These compounds are sensitive to temperature, light, and contamination—so keeping them in the right conditions matters from day one.
Before Reconstitution
- Store your peptide vials in the refrigerator (36–46°F / 2–8°C)
- They remain stable in this state for 12 - 24 months
- Keep vials sealed and away from light and excess moisture
After Reconstitution (Once Mixed with BAC Water)
- Store the mixed solution in the fridge at 2–8°C
- Use within 8 -12 weeks
There are a lot of shady peptide sites out there — underdosed, untested, and unreliable. BioEdge Labs is different. Every product is fully third-party tested, and I’ve personally vetted their inventory for purity, consistency, and price. If you care about your research, this is the lab to trust. Visit BioEdge Labs here →
How to Inject Peptides Safely: Using a Syringe or a Peptide Pen
If you're new to peptides, one of the first things you'll need to figure out is how you're going to administer them. Most peptides are injected just under the skin (a method called subcutaneous injection), and there are two main ways to do that: with a traditional insulin syringe, or with a newer tool called a peptide pen.
Syringes are the most widely used and give you precise control over your dosage. Peptide pens, on the other hand, offer a nearly needle-free option that uses pressure to deliver the solution into the skin. They're especially popular among beginners who want a gentler, simpler alternative to needles.
In this section, we’ll walk through how to use each method safely and correctly.
How to Inject Peptides with a Syringe (Subcutaneous Method)
Most research peptides are designed for subQ (subcutaneous) delivery—meaning they're injected into the fatty layer just below the skin. This method is fast, low-pain, and effective for absorption.
Step-by-Step Injection
- Wipe the top of your peptide vial with an alcohol pad.
- Draw your dose from your reconstituted peptide vial using a sterile 1ml insulin syringe (29–31 gauge, ½” needle).
- Choose an injection site: lower belly (about 1–2 inches from the navel), upper thigh, or glute area.
- Wipe off the site with an alcohol pad.
- Pinch the skin, insert the needle at a 45–90° angle, and inject slowly.
- Withdraw the needle, apply light pressure with a clean pad if needed—no need to massage.
- Cap the syringe and dispose. Do not re-use the syringe.
Tips for Success
- Rotate injection sites to prevent irritation or lumps.
- Never reuse needles—always start sterile.
- If your skin stings or bleeds, you may have gone too deep—try a new spot next time.
Using the Peptide Pen: A Nearly Needle-Free Option for Injection
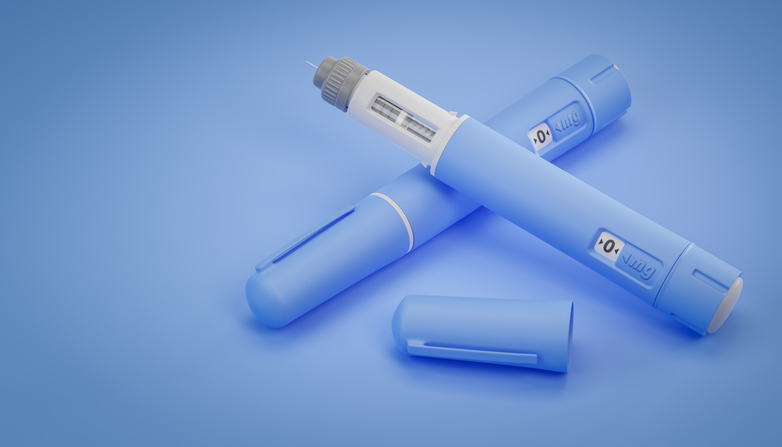
For those who want a gentler alternative to syringes, peptide pens offer a more comfortable and convenient way to administer peptides. While often described as “needle-free,” most peptide pens do use a very small, ultra-fine needle—typically so short and thin that many users barely feel it. These devices are popular among beginners and those who want easier, more discreet dosing.
How the Peptide Pen Works
- Use a sterile syringe to draw the correct dose of reconstituted peptide solution and load it into the pen’s reservoir or cartridge.
- When activated, the pen’s spring-loaded or dial-based mechanism delivers the peptide under the skin through a fine needle, usually between 4–6mm long.
- The delivery is quick, and most people report only very mild pressure or a slight “snap” sensation—no sting or puncture.
Note: There is also a device that is completely needle-free called a jet injector. These use high-pressure air to push the peptide through the skin with no needle at all—but they’re more expensive, less common, and require careful technique.
Peptides can get expensive, but as an FYI - BioEdge is doing 15% off this month (code mars15 at bioedgepeptides.com), one of the few suppliers that consistently delivers what their lab reports claim.
Peptide Pen Safety Tips
- Always follow the manufacturer’s instructions—each pen may differ slightly in loading, pressure, and technique.
- Use the correct volume and settings. Some pens require you to adjust the pressure or dial to control how much peptide is released per click or press.
- It's important to rotate delivery sites when using a peptide pen to maintain healthy skin and ensure optimal peptide absorption
Track Your Peptide Protocol Like A Pro
Tracking your peptide use isn’t just about staying organized—it’s how you figure out what dosage and schedule work best for your body. Most people start with general dosage ranges—but tracking is how you personalize and optimize for your body based on real-time feedback.
Use a digital tracker, spreadsheet, journal, or app—whatever keeps you consistent. Here’s what to include:
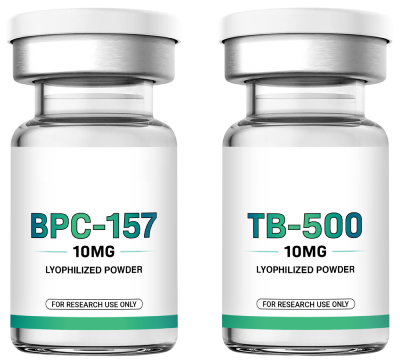
- Peptide name (e.g. BPC-157, Semaglutide)
- Date & time of dose
- Amount taken (in mg or mcg)
- How you took it (syringe, pen, etc.)
- Injection site (Remember to rotate )
- How you are feeling (pain relief, energy, mood, sleep, hunger, etc.)
Tracking your peptide use helps prevents common mistakes like double-dosing, skipping days, or overusing the same injection site. It also helps you catch side effects early on and dial in the right dose for your goals.

Recommended Dosage Guides
For convenience and safety, always reference research-backed ranges and start conservatively. You can find full dosage protocols, contraindications, and suggested guidelines for the following peptides here:
- BPC-157: How it Works, Dosage and Side Effects
- TB-500: How it Works, Dosage and Side Effects
- Retatrutide: How it Works, Dosage and Side Effects
- PT-141: How it Works, Dosage and Side Effects
- Semaglutide: How it Works, Dosage and Side Effects
- CJC-1295: How it Works, Dosage and Side Effects
How to Source Peptides Safely
Not all peptides are created equal. And in today’s flooded online market, there’s a big difference between a research-grade compound and a mystery vial with a fancy label.
Red Flags to Watch Out For
- No certificate of analysis (COA) or third-party testing
- Websites promising miracle cures
- Ultra-low pricing that seems too good to be true (it probably is)
These are all signs the product could be underdosed, contaminated, mislabeled—or not even what it claims to be.
What to Look For Instead
When shopping for peptides, look for signs of transparency and legitimacy:
- cGMP-certified manufacturing (follows pharmaceutical-level cleanliness and quality standards)
- Third-party lab testing with purity results of 99% or higher
- Peptide companies that serve research professionals and labs
- Accessible COAs, batch tracking, and documentation
Everything you should’ve known about peptides… all in one place.
Instant Access • No Spam • Research Use
Peptides can get expensive, but as an FYI - BioEdge is doing 15% off this month (code mars15 at bioedgepeptides.com), one of the few suppliers that consistently delivers what their lab reports claim.